こんにちは。ハヤトです。
今日は初心者向けにCSSだけで無限に動き続ける図形を作っていきたいと思います。
使うのはanimationプロパティだけです。ではいきましょう。
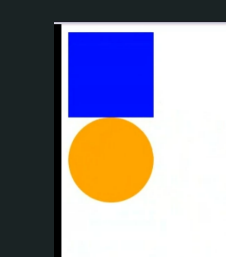
完成図
HTML
<!DOCTYPE html>
<html lang="ja">
<head>
  <meta charset="UTF-8">
  <meta name="viewport" content="width=device-width, initial-scale=1.0">
  <title>無限に動く図形</title>
  <link rel="stylesheet" href="style.css">
</head>
<body>
  <div class="box"></div>
  <div class="circle"></div>
</body>
</html>
はい、divタグだけです。かんたんですね。
CSS
.box {
  width: 100px;
  height: 100px;
  background-color: blue;
  /* アニメーションの設定 */
  animation: move-around;
  animation-duration: 4s;
  animation-iteration-count: infinite;
}

.circle {
  width: 100px;
  height: 100px;
  background-color: orange;
  border-radius: 50%;
  /* アニメーションの設定 */
  animation: move-around-reverse;
  animation-duration: 4s;
  animation-iteration-count: infinite;
}

@keyframes move-around {
  25% {
    transform: translate(200px);
  }

  50% {
    transform: translate(200px, 200px);
    border-radius: 50%;
  }

  75% {
    transform: translate(0, 200px);
  }
  /*
  100% {
    transform: translate(0, 0);
  } */
}

@keyframes move-around-reverse {
  25% {
    transform: translate(0, 200px);
  }

  50% {
    transform: translate(200px, 200px);
    border-radius: 0%;
  }

  75% {
    transform: translate(200px);
  }
}
解説
順番に見ていきましょう。
.box {
  width: 100px;
  height: 100px;
  background-color: blue;
  /* アニメーションの設定 */
  animation: move-around;
  animation-duration: 4s;
  animation-iteration-count: infinite;
}

.circle {
  width: 100px;
  height: 100px;
  background-color: orange;
  border-radius: 50%;
  /* アニメーションの設定 */
  animation: move-around-reverse;
  animation-duration: 4s;
  animation-iteration-count: infinite;
}
boxクラスとcircleクラスの大きさと色をしています。
- animation
animationプロパティで動かすために名前を決めてあげます。名前がないと設定するときに不便ですよね。ちなみに名前は変数みたいなもので何でもいいですよ。 - animation-duration
このプロパティで1回あたりの時間を教えてあげます。今回の場合は4秒で1週してという意味です。 - animation-iteration-count
このプロパティで性質を決めます。今回はinfiniteを使っているので無限に動き続けます。
@keyframes move-around {
  25% {
    transform: translate(200px);
  }

  50% {
    transform: translate(200px, 200px);
    border-radius: 50%;
  }

  75% {
    transform: translate(0, 200px);
  }
  /*
  100% {
    transform: translate(0, 0);
  } */
}

@keyframes move-around-reverse {
  25% {
    transform: translate(0, 200px);
  }

  50% {
    transform: translate(200px, 200px);
    border-radius: 0%;
  }

  75% {
    transform: translate(200px);
  }
}
@keyframes
これでアニメーションの動きを決めていきます。
さっきanimation-durationで時間を決めたじゃないですか、それを次はパーセンテージで分けていきます。今回は4分割しているので25%ずつになります。わかりやすいほうがいいですよね。
transformプロパティで図形を移動させてます。
ちなみに、@keyframesのうしろについているのはanimationプロパティで決めた名前です。
「名前がないと不便ですよね」といった理由がわかりましたか?
まとめ
- animation
- animation-duration
- animation-iteraction-count
- @keyframes
を学習しました。ぜひ自分のCSSにも取り入れてみてください。
では

コメント